
Introduction To Arduino: Creating Interactive Projects
Build simple interactive Arduino projects through hands-on experiments
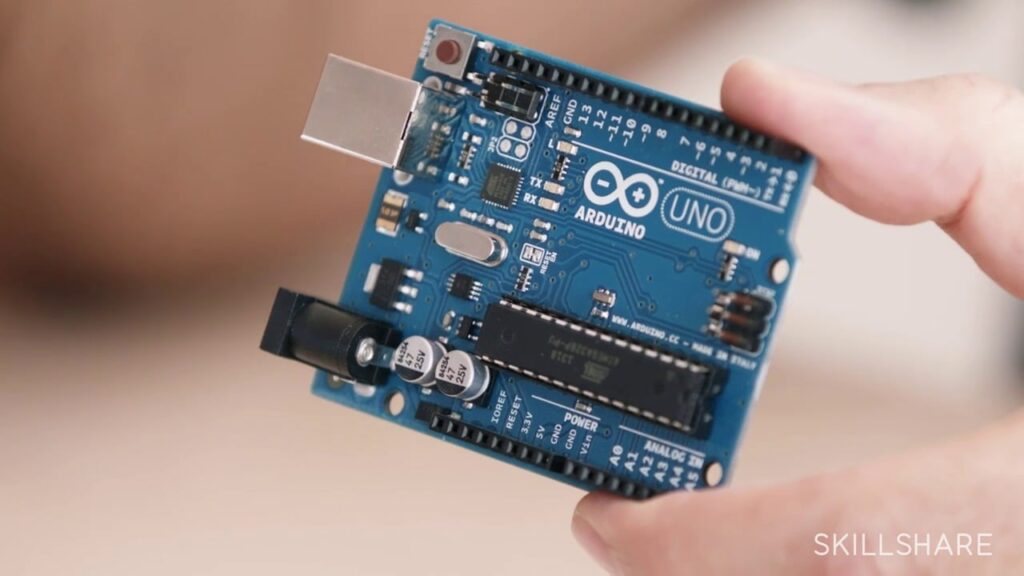
Introduction To Arduino: Creating Interactive Projects delivers a project-first introduction to microcontroller prototyping, blending practical hardware work with basic programming so learners can move from zero to making functioning interactive devices. The course walks you through setting up the Arduino IDE, wiring a solderless breadboard, and programming outputs like LEDs, servos, and simple speakers.
Targeted at makers, hobbyists, and educators, the class emphasizes hands-on experiments, iterative troubleshooting, and shareable project work to build practical confidence with sensors, potentiometers, and basic circuits. This is a pragmatic on-ramp for anyone who wants to prototype interactive projects without heavy theory upfront.
At a Glance
Introduction To Arduino: Creating Interactive Projects is a beginner-friendly Skillshare class that introduces hands-on electronics prototyping using Arduino boards. Mark Frauenfelder leads practical hardware demonstrations and experiments that cover setting up the board, basic circuits, and simple outputs such as light, motion, and sound.
| Level | Beginner |
| Rating | 4.5 out of 5 |
| Duration | 50+ minutes |
| Languages | English |
| Learners | 5K+ learners |
| Certificate | No formal certificate |
| Access | Access while your Skillshare subscription is active |
| Course includes |
|
| Price | Included with Skillshare subscription (monthly or annual plans) |
What This Course Teaches
The course frames outcomes as concrete, demonstrable maker skills for prototyping with Arduino, emphasizing hardware setup, software configuration, and creating interactive outputs with clear input/output relationships.
Learners will install and configure the Arduino toolchain, assemble and wire simple circuits, upload and modify sketches, and apply sensors and actuators to produce controllable light, motion, and sound behaviors.
How the Course Is Structured
The class is organized as a sequence of 11 short, focused video lessons that progress from an introductory overview and parts list through step-by-step experiments and a brief wrap-up. The full course runs about 50+ minutes in total and is presented as a single short-module workflow rather than a multi-week program.
Curriculum overview
01 Trailer ▾
Brief course preview outlining what you will build and the materials you’ll use.
02 What Is the Arduino? ▾
Introduces the Arduino platform, its origins, and typical maker applications to set context for the experiments.
03 What Do You Need? ▾
Lists required hardware and consumables, with recommendations for starter parts and where to source kits.
04 Installing and Connecting Your Arduino ▾
Step-by-step walkthrough for downloading the Arduino IDE, selecting the board, and connecting the board to your computer.
05 Blink Rates ▾
Demonstrates the built-in Blink example and how changing delay values alters LED blink timing.
06 Blink Rates with Components ▾
Extends the blink exercise to an external LED on a breadboard and shows basic wiring with resistors and jumpers.
07 Knobs and Potentiometers ▾
Shows how to wire a potentiometer as an analog input and use its readings to change output behavior like blink rate.
08 Servos ▾
Guides wiring and programming of a servo motor and shows how analog input can control motion.
09 Speaker Tones ▾
Covers wiring a small speaker and running example sketches to produce and vary tones based on sensor input.
10 What’s Next? ▾
Recommendations for continuing projects, additional resources, and ideas for extending the experiments into new builds.
11 More Creative Classes on Skillshare ▾
Pointers to related Skillshare classes and creators for learners who want to broaden their maker skills.
Audience & Requirements
The class is targeted to non-specialists who want a quick, practical entry into physical computing through guided, project-based experiments. It is primarily designed for beginners and creative makers who prefer hands-on learning over formal electronics theory.
- Hobbyist makers and DIYers starting with simple electronics projects.
- Complete beginners with no prior programming or electronics experience.
- Educators or parents seeking short, classroom-friendly maker activities.
- Creative professionals exploring basic interactive prototyping.
- Arduino Uno (or compatible Arduino board).
- USB cable to connect the board to a computer and the Arduino IDE installed (Windows/Mac/Linux).
- Solderless breadboard, header pins, and jumper wires for prototyping.
- Passive components: LEDs and resistors (including 4.7kΩ, 220Ω, 100Ω where specified).
- Sensors and actuators used in the class: a potentiometer, photoresistor, small speaker (≈8Ω/1W), and a standard hobby servo motor.
- No prior programming, engineering, or electronics knowledge required.
Final Verdict
This concise, hands-on class delivers immediate practical value for newcomers who want to start building with Arduino without wading through heavy theory. It’s a high-value, low-commitment introduction that favors reproducible experiments and iterative tinkering over formal credentialing.
Given its positive reception and broad learner adoption, plus access through a subscription model and no formal certificate, the course is recommended for hobbyists, educators, and beginners seeking a fast, project-focused entry into physical computing. If you need deep electronics theory, rigorous assessments, or a professional certificate, plan to follow this class with more advanced or credentialed training.


 Pluralsight
 Codecademy
 LinkedIn Learning