
Advanced Character Rigging in Maya
Master production-grade Maya rigging for animator-ready characters
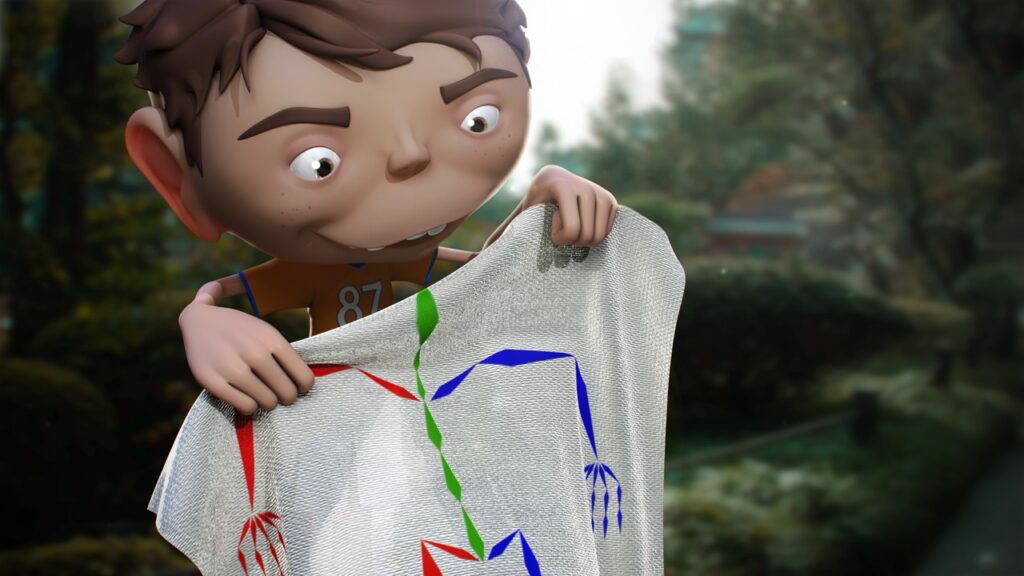
Advanced Character Rigging in Maya is a focused course that teaches production‑level rigging workflows inside Autodesk Maya, emphasizing practical techniques riggers use in animation and game pipelines. The lessons concentrate on modular rig construction, IK/FK systems, twist and counter‑twist solutions, and the tooling approaches that make rigs animator‑friendly.
Learners who complete the course should be able to implement and refine production‑ready rigs, create custom scripts and controls, and apply advanced skinning and deformation strategies to preserve volume and motion fidelity. The material is oriented toward hands‑on application, so participants should expect to follow step‑by‑step demonstrations and reproduce the setups on their own character assets.
At a Glance
Advanced Character Rigging in Maya is a Pluralsight course of focused Maya tutorials taught by an instructor experienced in production rigging.
It walks through modular rig construction, IK/FK systems, twist and counter‑twist techniques, and practical workflow tools for creating production-ready character rigs.
| Level | Advanced |
| Rating | 4.6 out of 5 |
| Duration | 9+ hours |
| Languages | English |
| Certificate | Certificate of completion |
| Access | Access while your Pluralsight subscription is active |
| Course includes |
|
| Price | Subscription-based; monthly or annual plans |
What This Course Teaches
This course frames outcomes as practical, measurable rigging competencies learners can demonstrate on production characters.
Learners will build modular rigs, create custom rigging tools, implement and enhance IK/FK and twist systems, and apply these techniques to finalize production-ready characters.
How the Course Is Structured
The course is organized as an introduction plus 68 focused video lessons presented as a chapter-style table of contents, and the full syllabus totals roughly 9.5 hours of material. The structure favors many short, task-focused clips that sequentially build a production-ready rig across the modules.
Curriculum overview
01 Introduction and Project Overview ▾
Overview of course goals, project files, and how the lessons are organized for the rigging workflow.
02 The Flexi-plane ▾
Introduce the flexi-plane concept and its role as a deformable control surface in rigs.
03 Starting on the Flexi-plane ▾
Begin constructing the flexi-plane geometry and initial rigging nodes required for control.
04 Controlling the Flexi-plane ▾
Add and configure control handles so animators can manipulate the flexi-plane predictably.
05 Finishing the Flexi-plane’s Translation Controls ▾
Finalize translation control behavior and ensure stable motion across the flexi-plane.
06 Organizing and Transforming the Flexi-plane ▾
Structure the flexi-plane nodes and apply transforms to integrate the plane into the rig hierarchy.
07 Setting up the Joints and Twist Control for the Flexi Rig ▾
Create joint chains and twist controls to preserve volume and produce natural deformation along the flexi rig.
08 Finalizing the Flexi-plane ▾
Tie up remaining setup steps and validate the flexi-plane across typical poses.
09 Preparing Tools and Custom Scripts to Make Our Workflow More Efficient ▾
Introduce and build small scripts and tools to speed common rigging tasks and file setup.
10 Starting on the Spine ▾
Begin constructing the spine rig, laying out the primary joints and control framework.
11 Animation Controls for the Spine ▾
Add animator-facing spine controls to drive twisting, bending, and posture adjustments.
12 Adding a Center-of-gravity Control ▾
Create a center-of-gravity control to influence whole-body balance and animation posing.
13 Rigging the Neck and Head ▾
Set up neck and head joints and basic constraints for natural rotation and follow behavior.
14 The Head Control ▾
Design an animator-friendly head control with usable rotation and offset channels.
15 Dynamically Parenting the Head to the Chest ▾
Implement dynamic parenting so the head can switch follow targets between chest and global space.
16 Connecting the Neck’s Flexi-plane to the Head Control ▾
Link the neck flexi-plane to the head control to produce smooth, volume-preserving neck motion.
17 Troubleshooting and Progress Check for the Torso ▾
Validate torso systems and address common deformation or control issues encountered so far.
18 Rigging the Legs ▾
Set up primary leg joints and the base structure for both IK and FK leg systems.
19 Creating Systems for Ik/fk Legs ▾
Build IK and FK leg systems with intent for switching and animator control.
20 Finishing the Ik/fk Systems for the Legs ▾
Finalize IK/FK blending, constraints, and ensure the systems switch reliably in animation.
21 Starting on Our Leg Controls ▾
Create animator-facing leg controls for foot placement, rotation, and IK targets.
22 Finishing the Reverse-foot Rig ▾
Implement and finalize a reverse-foot setup to support accurate foot articulation.
23 Animation Controls for the Ik Legs ▾
Add animator controls specific to IK legs for posing and motion refinement.
24 Creating Custom Channels to Control the Feet in Ik Mode ▾
Expose custom channels on foot controls to drive toe, roll, and pivot behaviors in IK mode.
25 Fk Leg Controls ▾
Create FK controls for the leg joints to support direct keyframing workflows.
26 Connecting the Fk Joint the Animation Controls ▾
Link FK joint rotations to animator controls while maintaining clean transform inheritance.
27 Swapping the Visibility of Our Ik/fk Controls ▾
Implement visibility and usability toggles so animators see only the relevant IK or FK controls.
28 Foot Bending Controls ▾
Add bend and flex controls to the foot rig for natural bending and weight shifts.
29 Creating a Stretchy System for the Ik Legs ▾
Design a stretchy IK setup to allow limbs to extend while preserving animator control.
30 Making the Ik Legs Stretchy ▾
Implement the math and node connections required to drive reliable IK stretch behavior.
31 Stretchy Fk Legs ▾
Apply stretchy behaviors to FK limbs and reconcile them with IK systems where needed.
32 Connecting the Stretchy Ik/fk Systems to the Primary Leg Chains ▾
Integrate stretchy IK/FK subsystems into the main leg joint chains for consistent deformation.
33 Connecting a Flexi-plane to the Left Thigh ▾
Attach a flexi-plane to thigh geometry to improve deformation and motion fidelity.
34 Creating Counter-twist Rigs to Hold Volume ▾
Build counter-twist mechanisms that maintain limb volume during twisting motions.
35 Finishing the Right Thigh’s Rig ▾
Complete the right thigh rig and validate symmetry and deformation performance.
36 Adding Flexi-planes to the Shin ▾
Attach additional flexi-planes to the shins to better control lower-leg deformation.
37 Finishing the Flexi-planes Connected to the Shins ▾
Finalize connections and behavior for shin flexi-planes across typical leg poses.
38 Bend Controls to Stretch the Knees ▾
Add bend controls to allow knee stretching while preserving believable joint deformation.
39 Troubleshooting and Progress Check for the Legs ▾
Check leg systems for issues and walk through fixes for common rigging pitfalls.
40 Rigging the Arms ▾
Lay out arm joint chains and initial control structure for upper limb rigging.
41 Creating Joints for the Hands ▾
Create a hand joint setup including wrist, palm, and preliminary finger joint placement.
42 Finger Joints ▾
Establish detailed finger joint chains and orientation to support natural curling and spread.
43 Ik/fk Systems for the Arms ▾
Build IK and FK arm systems and set up the infrastructure for switching between them.
44 Animation Controls for the Ik Arms ▾
Add practical animator controls for IK arms to manage reach, elbow direction, and hand pose.
45 Creating Fk Arm Controls ▾
Design FK arm controls for direct keyframing with predictable rotation behavior.
46 Swapping Between the Ik and Fk Arm Controls ▾
Demonstrate the quick swap routine for animators to toggle between IK and FK arm control sets.
47 Adding Clavicle Controls ▾
Add clavicle controls to influence shoulder positioning and upper-body articulation.
48 Creating Finger Controls ▾
Expose animator controls for fingers including curl, spread, and preset poses.
49 Finishing the Fingers ▾
Polish finger controls and ensure reliable behavior across common hand poses.
50 Stretchy Ik Arms ▾
Implement stretchy IK on the arms so limbs can extend naturally under animator control.
51 Stretchy Fk Arms ▾
Add stretchy behavior to FK arm chains and discuss integration points with IK systems.
52 Connecting the Primary Arm Chains to the Stretchy Ik/fk Systems ▾
Link the primary arm joint chains into the stretchy IK/FK subsystems for consistent motion.
53 Attaching Flexi-planes to the Shoulders ▾
Attach and configure flexi-planes at the shoulder to smooth transitions between torso and arms.
54 Connecting Flexi-planes to the Forearms ▾
Integrate forearm flexi-planes to improve skinning across rotation and twist ranges.
55 Bend Controls for the Arms ▾
Add bend and corrective controls to reduce collapsing or pinching during arm deformation.
56 Troubleshooting / Progress Check: The Arms ▾
Review arm systems, test poses, and address common issues before moving to binding.
57 Binding the Legs and Knee Preservation Joints ▾
Bind skin to leg joints and add preservation joints to protect knee volume during deformation.
58 Binding the Arms /Elbow Preservation Joints ▾
Bind arm geometry and add elbow-preservation joints to maintain silhouette during bending.
59 Binding the Head ▾
Bind head geometry and ensure facial/neck joints interact smoothly with the rig controls.
60 Skinning the T-shirt ▾
Weight and skin the shirt to follow torso and arm movement while minimizing artifacting.
61 Skinning the Shorts ▾
Skin lower-body clothing so it follows leg motion and interacts correctly with thigh flexi-planes.
62 Rigging the Shoes ▾
Create shoe rig controls and ensure they respond correctly to foot and ankle movement.
63 Troubleshooting and Progress Check for Skinning ▾
Review skinning results across garments and make corrective weight refinements where needed.
64 Rigging the Head to Squash and Stretch ▾
Add squash-and-stretch behaviors to the head rig for stylized deformation without breaking volume.
65 Finalizing the Rig ▾
Perform final cleanup, hierarchy organization, and preflight checks before delivery.
66 Using Ncloth the Animate the Flags ▾
Demonstrate using nCloth to animate simple cloth elements like flags and how they interact with the rig.
67 Improving the Counter-twist Systems Connected to the Character’s Legs ▾
Refine counter-twist implementations on the legs to further preserve volume in challenging poses.
Audience & Requirements
Advanced Character Rigging in Maya is intended for hands‑on riggers and technical artists who need production‑grade rigging techniques and expect to apply them directly to character builds. It is best suited to learners with prior Maya experience and a working knowledge of basic rigging concepts rather than complete beginners.
- Character riggers working in animation, game, or VFX pipelines who need advanced deformation and control techniques.
- Technical artists responsible for building reusable, animator‑friendly rig systems for production.
- Animators or generalists who want deeper rigging fluency to prototype or troubleshoot rigs.
- Freelance riggers and small‑studio developers preparing rigs for client or shipping builds.
- Autodesk Maya (course references Maya 2013; newer releases are usually compatible but check tool differences).
- Familiarity with Maya basics: joint chains, transforms, skinning, and the interface.
- Working knowledge of core rigging concepts such as IK/FK, constraints, and basic skin binding.
- Basic scripting familiarity (MEL or Python) is helpful for following and creating custom tools shown in the lessons.
Note: The course page classifies this offering as Advanced and the syllabus covers many production-level topics, but it does not list strict prerequisites; prospective learners should therefore ensure they already have hands-on Maya and basic rigging experience before enrolling.
Final Verdict
This course is a solid, practical investment for experienced character riggers and technical artists seeking production‑grade rigging techniques.
With a strong community rating and availability through a subscription service that includes a certificate of completion, it represents good professional value for practitioners who already work in Maya and want to level up their rigging toolset.
If you are new to Maya or basic rigging concepts, complete introductory rigging and Maya fundamentals first so you can follow the advanced workflows and scripts shown in the lessons.

 LinkedIn Learning
 Skillshare